 |
|
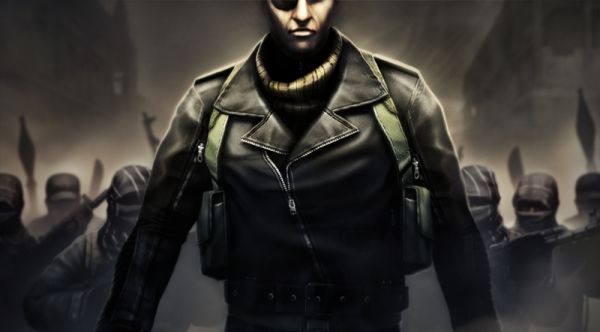
| Desert Fox | |
|---|---|
| Information | |
| Game Modes |
Fireteam |
| Popularity |
Low |
| Size |
Very Large |
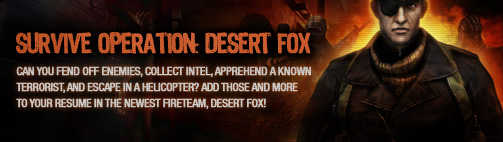
Desert Fox is Combat Arms' 4th unique Fireteam map (and 30th map released in Combat Arms). It was released during the 12/15/10 Content Update.
The story begins some time after the events of Operation Desert Thunder, where the JSF have been sent in to retrieve intel from Terrorist Z.
Overview
Desert Fox is a very fast-paced, chaotic Fireteam mission due to mission/time-constraints and the constant spawning of enemy AI. Players must navigate their way through a labyrinth of a city as they try to track down "Z".
The city is exceedingly widespread, and it rarely forces players to go in a single direction. As such, players often split up because of the many routes to take. The map has several ways to get to mission objectives.
Mission Briefing
Desert Fox will pit your survival skills against countless enemy AI.
Fireteam Elements
- Like Fireteam, messages are constantly being sent in using radio to keep you updated on the situation.
- Your enemies are once again enemy AI. This time, they are the Sand Hog militants.
- Players respawn and completely heal after each sector is cleared. Their ammo is also completely replenished.
- Special utility packs are once again present.
- Standard Ammo packs are for most primary weapons, usually Assault Rifles or SMGs. They can be noted by their plain, beige color.
- Heavy Ammo packs are much more scarce; they can replenish anything the SA packs would, as well as Explosive, Sniper, Shotgun, Handgun, and Specialist ammo.. They can be noted by their magenta color and larger size.
- Health packs are the rarest of all the packs, and will fully replenish your HP. They can be noted by their green hue and the icon of a green cross upon the pack.
Modes
- Normal
- Hard
- Extreme
Unlocked Areas (Mission objectives)
- Sector 1 - Hunt down/Kill Terrorist Z.
- Sector 2 - Destroy the Truck/Defend the site until communication is resumed.
- Sector 3 - Destroy all of the Anti-Aircraft weapons.
- Sector 4 - Defend the Evacuation point until the rescue squad arrives.
Enemies
Ending
Helicopters are sent in to retrieve the Fireteam squad. Several of them are seen locked in an aerial battle as they fight for control of the area's security.
Rewards
- Eye Patch - Hard difficulty.
- Extreme Eye Patch - Extreme difficulty.
Pre-Game Preparation
Stock up weapons with plenty of ammo. Explosives can be one of your best assets if used correctly. If you don't like Machine Guns, get scoped Assault Rifles, Specialist Items, or Sub-Machine Guns. Headshots are instant kills if properly aimed, or performed with the right weapons. Before entering a room, decide on how you're going to try and win. Get plenty of kills (but earn less points), or get plenty of points (but earn less kills). Different strategies can get different reward results.
In a full room, you may even plan out each player's position or role.
Support - Everyone should always be able to provide support. Support can use any variety of weapons; but it is suggested you specialize in one type only. Assault Rifles, SMGs, MGs, and Shotgun combinations are recommended.
Recommended Weapons:
- Assault Rifles - AK47, G36E, M4A1, M416, CX4 Storm, Modded M16 Variants, and many others. Almost any AR can be useful here, and it wouldn't hurt to modify it. Make sure you bring one at least one AR, as you can easily replenish their ammo with standard ammo packs (which are much more plentiful)
- Machine Guns - Choose Machine Guns that have high damage (MK48/M60), low recoil (RPK/M21E), or a very fast fire-rate (MINIMI/K3). Try to avoid the M60, because it is terrible in damage and firing speed.
- Shotguns - Shotguns can be useful in any situation, especially when you are defending an area at short notice. Their drawbacks include low ammunition and a CQC firing-range. If you plan on using one, a semi-automatic shotgun is recommended, such as the M4 Super 90 or one of the SPAS-12 series.
Sharpshooter - Sharpshooters are a vital part of keeping the militants off your back. Though they gain fewer overall points, sharpshooters are capable of getting massive amounts of kills. They may or may not be a popular team member since they often steal, hoard, or accumulate more kills, but they are important nonetheless. Their job is to make sure the enemy doesn't have a chance to blink as soon as they spawn. They must be able to get headshots as much and as soon as possible at any range. It should be noted that sharpshooters are usually the most vulnerable, not having time to change from their sniping point-of-view. Always check behind you every once in a while to make sure your teammates are doing okay, or you're not getting attacked. Teamwork is important so don't abandon a sharpshooter to get more kills. Just the same, sharpshooters should not fully depend on a others so be prepared to fight in CQC.
Recommended Weapons:
- Assault Rifles - AUG, G36E, AK-47, M416, M4A1, CX4 Storm, or any other efficient AR.
- Sniper Rifles - Use semi/fully-automatic sniper rifles. The SR-25 and its variants are ideal in a situation like this, with powerful damage, fast firing-rates, high-accuracy, plenty of ammo, and light weight. Do not depend on "Overpowered" Sniper Rifles such as the L96A1. Power weapons are useless here, and bolt-action Sniper Rifles are often inaccurate, heavy, and incapable of dealing the damage they normally would. The L9 Magnums, however, can be useful for their raw damage and quick firing rates.
- Machine Guns - Keep at least one on you, as you won't be sniping forever. Stick with a good MG like the GP MK.48 or NX M21E.
Heavy Infantry - Heavy Infantry are an extremely lethal force in combat. Thanks to their reckless rushing tactics, they often get a lot of points and kills each game. However, they need a lot of ammo and weaponry if they are to last long. Infantry supports the team by weakening and killing enemies without pausing to reload. This is important since the enemy will not wait on you mid-combat, leaving you exceedingly vulnerable.
Recommended Weapons:
- Assault Rifles - As mentioned earlier, have at least one AR in case your Machine Guns run out of ammo.
- Machine Guns - Bring as many Machine Guns as you can, at least 3. As stated earlier, choose Machine Guns that have high damage (MK48/Negev), low recoil (RPK/M21E), or a very fast fire-rate (RPK/MINIMI/K3). Try to avoid the M60 series, because it is terrible in recoil, spread, accuracy and firing speed. But it slows you down alot, so it's not handy to have in the first sector.
Demolitionists - Demolitionists are in a class of their own. Though they are not frequently seen, their weapons pack the most damage out of any other class. Use LAWs and RPGs to take out enemy crowds from afar, and use your grenades to weaken or take out large groups of enemy AI.
Recommended Weapons:
- Machine Guns - Bring at least one Machine Gun or Assault Rifle with you, as your explosives will usually be short in supply. Your MG or AR can help finish them off.
Explosives:
- A LAW and/or RPG-7 - Use these weapons to take out groups of enemies clustered far away or in a holed-up spot. If you prefer a different style of combat, switch them out for either a fallen teammate's weapon (try to pick up an AR/MG). However, unlike Cabin Fever and Black Lung, these rocket launchers are a one hit kill to the AI if the rocket hits them directly.
- A M69HE Frag/NL - These explosives will always be a OHKO on the enemy, so use them sparingly.
- M67 Frag Packs - Very effective here since there is strength in numbers. Use repeated grenade showers to severely weaken the enemy.
- Mines - Unlike Desert Thunder, it's quite useful at certain moments to hold enemies away at the 2nd sector and the last sector. Plant mines in the house or below the stairs will keep the terrorist away from getting on the balcony. But then again: Plant wisely!
- Incendiaries/Airstrikes - Possibly the most useful method of using explosives here, these weapons can clear off exceedingly large waves of enemies.,
- M32 and M32 Variants - Possibly one of the mixed weapons, for usage here in Desert Fox. It can be good for clustered enemies, as if aimed properly can take out a good group of enemies. Since it also does splash damage, it can injure other bots. Which in turn can bring them together more. Obviously known M32 Incendiary Bomb and basic M32 Grenade Launcher, will be better choices for this. Also the M32 Stun Grenade seems effective, but not so frequently used.
- Caltrops are a new addition to the Specialist lineup, and also count as explosives. Usually good replacement for mines. You can carry both, but don't place them together as the Caltrops will be made useless. Found to be a good addition to any lineup, place them in front of spawning doors to stop spawning enemies. Not always 100% effective, but placed properly you can limit the spawn. Don't forget to replace them though, when they eventually disappear.
Meds and tokens: Medkits, serums etc. are very useful! It helps you and your team a lot, put them somewhere safe. Don't use tokens if you died in the first or second sector.
Walkthrough
This is a basic walkthrough that can be used on any difficulty. As the situation becomes more difficult, some tactics must be changed to suit any new objectives.
Pre-game: Before the game starts, stock up on as many provisions as you can. The best weapons would be anything with a lot of ammo and high damage. Try to get familiar with your teammates as communication is the key to winning. Arguing will only lead to quitting and discordance. Also pick a good room with plenty of experienced players. One of the best servers to play DF is usually the Black Market. Specialists are well known for their superiority over the other players and should be used in Desert Fox as much as possible. Make sure you have ALL 8 players before proceeding, and emphasize the importance of not leaving the game after the time limit is sealed.
Sector 1:
Your first mission is to find and capture Terrorist Z. First, move up the street and take out any resistance. This should be easy as there is plenty of places to take cover, and your entire team will be supporting you. However, notice that Terrorist Z will appear ahead of you, and then quickly run to either the left or the right. Make sure you know which way he went. Once you reach the end of the first street you will be ambushed by a few terrorists from the sides, so be careful.
Now you have reached the town itself, and you need to track down Terrorist Z. You have two options:
- Kill him (by shooting him)
- Or capture him alive (by touching him)
Similar to a "boss" character, Z can be very fast, so it will take speed and skill to catch up to him. If you'd rather get it over with, shooting him is always an option although it is not a good one.
Z can be seen on your map after a couple of minutes, use the map button (M) to find Terrorist Z, the yellow dot that moves very fast and tries to get away from you and your teammate is TERRORIST Z. Occasionally, Terrorist Z appears as a target sign on your map, making it easier to track him.
If you kill Terrorist Z, you will have to survive in the next sector for a time limit of 5 minutes, but if you capture, you will only be required to survive for 3 minutes. Therefore, it is recommended to capture Terrorist Z, in any mode of difficulty.
Sector 2:
Once you have reached the Terrorist truck, you have two options (depends if you killed/captured Terrorist Z):
- Plant explosives on the truck and hold out until it explodes (If you have captured Terrorist Z)
- Search the Terrorist truck. It will explode and you will be ambushed. You must hold out until the timer runs out. (If you killed Terrorist Z)
Either way, you will have to hold out and survive until the timer reaches zero. One of the nearby buildings has a stairway up the the second floor, have two people guard the stairs, and the rest use assault rifles and sniper rifles to take out enemies. After you survive the ordeal, Colonel Coleman will tell you to destroy 3 anti-air guns to allow air support. However you must first find where the AA guns are.
Carefully take care of any surviving militants (use your map), and then enter the designated building. Beware, when you go through the second door the AI's might be right in front of the door so when you open it the will melee attack you or they might be shooting at the door before you even go in. Prefire while going through the door to kill any AI's that might be right in front of the door or standing near it.
Sector 3:
After you find the coordinates, Colonel Coleman tells you to destroy the three anti-air guns by planting C4s on them. If you downloaded information from the wrong terminal then you will receive six locations where the AA guns could be. The guns are spread out and guarded. To make matters worse, enemies will continue to spawn all over the map. To destroy the anti-air guns, enter the building they are in, kill the guards, and then press and hold E on them bomb spot to plant the bomb. It takes a while to plant it, so make sure all of the guards are dead. Once the bomb is planted you have a little bit of time until it blows up (it explodes on the fourth beep), use this time to escape. Once the bomb blow up you can revisit the destroyed AA gun and snipe enemies in the streets. After you destroy all three anti-air guns, you must reach the extraction point: a glowing circle with the letter H in the middle. It appears in the center of the town.
Sector 4:
After you reach the extraction point, you must hold your ground to allow the extraction team to come. During this phase you must survive for a few minutes. You will be ambushed from all sides.
Two good places to hid/take cover during this are: A.) next to the two stacked crates. There is a small ledge on the bottom crate that can be used to stand on and fire over the top of the second. This area still leaves you open for LAWs, however. B.) behind the truck on the far side of the battle field. Beware, enemies can walk up next to you and drop grenades when they die.
Strategies
These are different strategies submitted by certain players who have had quite a lot of experience from playing Desert Fox. If you wish to submit your own strategy, please submit it here:
An entire walkthrough for Extreme (which surprisingly isn't that hard) is as follows:
When you first spawn, take out all the AI's you see. Then move behind the dumpster and shoot into the door that the AI's will emerge from. This will neutralize them with little or no damage to your team. If however, someone dies, they can just leave and rejoin the game (unless Nexon decides to patch this). In the capture Z section, players are advised to spread out as eliminating the AI's right now isn't a challenge and this will allow for Z to be captured quicker. Players do not have to actually touch Z; they only need to be close to him. After the cutscene, everyone should regroup and push towards the objective. Everyone will have health restored and players will be revived.
For the next part, just plant the C4 on the truck and go to the building as soon as possible. Players should fire directly into the three spawn points of the AI's. With every player covering each other, this isn't much of a challenge. However, be sure to cover the stairs as if the AI's reach it, all will be lost as their grenades and melee attacks will decimate the entire team. An alternative for this is waiting in a corner right of the building, this is best to be done with 1 or more of your teammates, you can snipe down AI from the 1st and 2nd building. The terrorist would normally leave you alone except the ones that walks into the wall, they will shoot you so shoot them down when you notice one of them is walking against the wall. When the timer runs out, be careful because the terrorist will still attack you, survive that part and go to the objective. When the area is cleared(you don't need to kill all AI), go receive the intel on the locations of the anti-aircraft batteries. Afterwards, go to the objectives.
For this part, it's best to split into three teams: two groups of two and one group of four. The two man teams each take one battery while the third group goes and clears the immediate area. After the first two have been destroyed, everyone should regroup and attack the third as the route there is more heavily populated by AI's. After the third battery is destroyed, everyone will end up back near the beginning.
For this part, AI's will spawn from predetermined points. The best way to guard this is to have two people camp the ruins, three people camp the wooden "desk", and the rest hide next to the boxes and the metal barrier. There is a spawn next to the metal fence, next to the desk, across the map from the boxes, and across the boxes. The job of the ones camping the boxes is to attack the ones that spawn next to the desk people and across from themselves. The job of the desk people is to take out the ones that spawn across the area. The ones camping the ruins will take out the AI's that spawn from the metal barrier. Using this strategy, it is even possible to hold out with only two people: one next to the boxes and on in the ruins. However, the AI's are prone to using RPG's at this point so it is advised to eliminate any AI on sight. Prefiring is an advisable tactic. Using this, the completion of Extreme becomes a surprisingly easy task if you work together as a team!
In any mode, rushing through the very first streetway can be a very strong option. It works best while holding a lighter gun, such as a SMG. Doing this allows you to gain massive amounts of points and kills. Also, you can get behind the spawning AIs, allowing you to shoot them without them shooting you. It takes a rather high skill level to pull of this rush correctly, as you will be facing all the spawning enemies alone.
Intel (Mission Updates)
These are the mission updates that will be sent to you by various characters as you progress through the mission.
CC= Colonel Coleman; SE= Sergeant Evans
Section One
Colonel Coleman (CC):"We have received information that Z is in your area. Z must be captured alive and the terrorist attacks must be prevented!"
CC: "Pay attention. We'll update you on the situation as we go asking."
CC: "Z is just up ahead. Remember, we need Z alive so we can interrogate Z about the terrorist"
If Terrorist is injured: CC: "Whatever you do, don't kill Z. We need Z alive."
Cutscene plays if you capture him: Z will be kicked to the ground while the team takes the information
CC: "We got some information from Z. Move to the secret rendezvous point!"
Section Two
If Terrorist Z has been captured:
CC: "Kill the guards near the terrorist truck. Then plant a bomb on the truck."
CC: "Nearby enemies heard gunshots. They're on their way to intercept you. Defend the area until the truck explodes!"
2 min. remaining: CC: "Enemies continue to approach. Defend as long as you can. This mission must be completed!"
Timer reaches zero SE: "You have successfully blown up the terrorist truck."
CC: "You have prevented the terrorist attacks. I'll fill you in on the escape details shortly. Get moving!"
SE: "There are too many enemies in the city for you to escape. You'll need to be extracted by helicopter."
CC: "We'll provide helicopter support. You get the hell out of there."
CC: "There's just one hitch. The anti-air artillery must be destroyed for us to get the choppers in there."
CC: "Z has information on where the anti-air artillery is located. We'll get back to you."
If Terrorist Z has been killed:
CC: "Search near the truck!"
Truck explodes
SE: "It's a trap! We need backup!"
SE: "... ..."
SE: "The explosion broke the radio. Survive until the radio is restored."
4:35 remaining: SE: "Enemies are waiting in buildings to ambush us!"
4:05 remaining: SE: "Enemies are coming from everywhere!"
3:00 remaining: SE: "We are completely surrounded! Try to hold on until the radio is fixed."
Section Three
CC: "The exact coordinates of the anti-air artillery guns have been identified. Destroy the gun on the roof of the building!
Section Four
SE: ""
CC: "There's nowhere else to land the chopper. Secure the landing zone before we get there."
About 1 min. 10 sec. remaining: SE: "More enemies are on their way! The area must be secured before you can make your escape!"
Trivia
- It's debated whether or not Desert Thunder or Desert Fox is the prequel to Sand Hog, as both missions end with the team being escorted away via helicopter with classified intel.
- Desert Fox is the second Fireteam map to take place within the desert. It is also the first desert map to take place in the late evening.
- Desert Fox is also the second map to include the word "Desert" in its name, the first being Desert Thunder. Coincidentally, they are both Fireteam maps.
- Desert Fox is the first Fireteam map to be released in the same year as another Fireteam map, and they were both released within a short amount of time between each other. The other map is Black Lung.
- "Desert Fox" is a term which has been used to describe someone very skilled in desert warfare. The WWII German Field Marshal, Erwin Rommel, was known as the legendary "Desert Fox".
- A new Specialist had been revealed, though players had no idea who it would look like. Judging from the teaser image, many people expected a Mercenary similar to Hawk. The person in the image is in fact, Terrorist Z, while the Specialist was actually Raven.
- As of the 12/15/10 Content update players can now join Fireteam matches in progress, with the window for joining open for up to 3 minutes in Desert Fox.
- Terrorist Z is one of the fastest AI in the game, and it will take Speed to catch up to him.
- He is also the only NPC who is programmed to sprint.
- Like the other terrorist types, Z has a rank: First Lieutenant. This shows up on top of his AI and might be a hint that there might be at least one more Fireteam involving a General.
- There's a bug which may make Terrorist-Z look like a standard shemagh-terrorist.
- The AI of Desert Fox speak much more than they would in Desert Thunder. The phrases first heard in Desert Thunder will be spoken regularly, a contrast to their usual quiet behavior.
- In the first cutscene, where Z is captured, Hauser can be seen running up to Z in the background.
- The item you retrieve from Z looks like strikingly similar to a Black Hi-Sec Key, which is also a USB drive.
- Many doors will now say "This is blocked" or "You cannot enter" instead of doing nothing. You will see the same thing appearing in Desert Thunder as well.
- On the other hand, this has caused many new glitches to appear in maps that have nothing to do with Fireteam.
- Sometimes the AI will shoot at you before you even enter a specific area, which leads players to believe that the AI have aimbot and chams. This isn't entirely wrong, as all the AI's are always aware of your exact location, but scripting tells them when to react to you. Sometimes the script behaves incorrectly, causing the AI's to know where you are before they should.
- Even if everyone on your team dies at the very end, if the timer for the 4th section runs out before the timer to use respawn tokens does you win.
- There is also a glitch in Desert Fox where Z will end up glitched inside a building with his feet dangling forcing you to kill him.
| v · e · d |
|---|
| Warzones |
| Released Warzones: |
| • Battle at City Center • Bloodbath Bazaar • Blood Money • Brushwood • Cold Seed • Costa Recon • Crystal Tower Dark Forest • Death Room • Death Row • Dredge • Ghost Town • Grave Digger • Gray Hammer • Hallow Ravine • Junk Flea • Junk Flea 2 • Kill Creek • Neptune • Oil Rig • Overdose • Piazza • Power Surge • Pump Jack • Rattlesnake • Red Canyon • Roadkill • Rural Estate • Sand Hog • Sector 25 • Short Fuse • Showdown • Slaughterhouse • Snow Valley • Training Grounds • Two Towers • Vertigo • Warhead • Waverider |
| Fireteam: Black Lung • Dead Vacation • Desert Fox • Dead Water • Desert Thunder • Cabin Fever • NEMEXIS HQ • NEMEXIS Labs • Outpost 31 |
| Unreleased Warzones: • Glitch Map |
Media

Combat Arms Desert Fox Glitch

Desert fox flythrough NEW MAP SNEAK PEAK COMBAT ARMS


